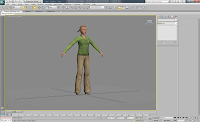
Following on from the previous lesson we were looking at further adding the biped to a model of our own.
We were supplied with a model of a woman in a green - jacket and were tasked with retexturing her to her to a design of our own.
I decided to go for a survival/action hero look, with ripped jeans and bloody attire, I used textures of jackets and denim to create the outfit, then painted the stains over the top. I found the model very easy to texture - but no matter how much I edited the face, unfortunately it was still stuck with the same low detailed structure.
Once fully textured I had to insert the biped into the model, lining up the body parts to the biped like I did with the skeleton in the previous lesson. I found it easier to do than before, mainly due to teh fact the female model matched the biped's figure fairly well.
Once lined up, I added a skin modify to the model and used the biped's bones as the skeleton. I then had to edit the envelopes and vertices to control the strength of certain bones over the model's frame. I found it a very tedious task, and I did not finish it perfectly - however I understand how the process works now, and I find it simple to use - if just a one that requires alot of patience to fine tune the vertices.
I created a small animation to test the weighting on the model, and see what body parts tear and clip. I think it came out ok, there isn't any major deformation and the model remains somewhat in proportion, obviously I could of fine tuned it further, but I ran out of patience at the time - what with 3ds max glitching out half the time.
To round up the skinning side of the project, I was given a model of frog to unwrap it's uvs and texture.
Following a tutorial I applied a UVW map to the model, and used the pelt tool to cut seams around the limbs and head.
Splitting the uvs apart like this means I could create a easy to read and well laid out uvw map, for me to texture It was simple enough to do, the tutorial explained it well, but it was a long process, but I can see the accuracy of the maps and how they reflect onto the model. Eventually I was left with a full map, constructed from the pelted model.
Using photoshop and a tablet, I painted the model's basic colour scheme before, adding frog texture, and a shiny overlay. The uv map wasn't perfect, but it didn't pinch too much and it was easy enough to texture with minimal stretching.
I'm quite happy with what I learnt using the pelt tool, I found laying out a uv map to orignally be a daunting task but after doing this exercise it's really quite simple, just will take further practice which I intend to use.


No comments:
Post a Comment