Wednesday, 6 May 2015

Grass and Bushes - Modelling and Texturing

To add some life to our scene, I worked on creating some vegetation for our scene.

I began with creating a Photoshop file so I can place my various textures for our grass and plants.


I first experimented with using the fur and hair modifier in 3ds max, to create some tufts of grass.


My goal was to render this image out, and use it as a Alpha/Texture map for a thin set of grass.


Although this did work to create some decent grass, I felt it was a bit thin. I didn't get rid of the texture, but I decided to approach with a different method.

I attached the texture to a plan, and uv mapped it to overlap the appropriate grass. I then duplicated the planes and moved them around until I had a fairly large tuft of grass.


I pretty much repeated this process, however I decided to use google to help find textures and photos for the other grass and foliage, as opposed to baking it myself.

I mainly decided to do it this way, as I felt I could probably only get a very limited result from repeating the hair and fur process.


Once I had my textures in place, I repeated the planes techniques and used multiple planes to create my grass and plants.

I varied the size and thickness of the plants for more variety.


I made a separate texture map for my shrubs and bushes.

I approached it the same way, however for some of the plants I used a small trunk model to make the shrubs more believable and convincing.


Once I was happy with the models, I sent them to unity.

However I found myself with a few issues, namely the scale kept messing up. After some tweaking I managed to fix it by resetting the transforms.

I also experimented with shaderforge, I added a modified version of their vegetation shader, to my plants so that they would move slightly.


Although it was a bit of a fiddly and tricky process to get the plant alpha's how I wanted, I'm quite happy with the results.

I would like to experiment with shaderforge more, maybe look at adding a PBL shader, since the current shader I'm using is lacking it.

The Gorge Bridge - Modelling and Texturing


To transverse the vast gorge in our game, we needed a large bridge to cross it.
I started off by creating a plane roughly the same length/width of the gorge itself.
I originally intended to make a traditional model of a bridge.

However we decided that a) we wanted it to be a modular piece, and b) something more natural/less man made would be better in terms of context for the scene.
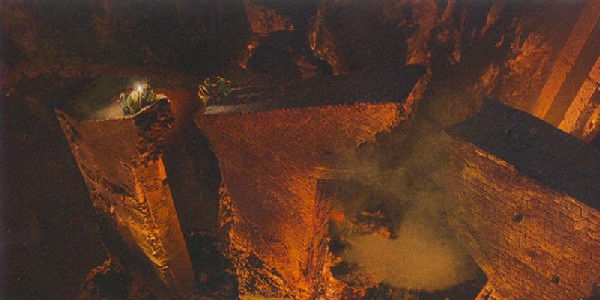
For this natural/carved bridge shape I was looking at fantasy rock bridges, such as the dwarven bridge of Khazadum in The Lord of the Rings:


I constructed a column with a small pathway on top, I felt this would give the best general shape. I could then attach the pieces together to form a bridge across the gorge in Unity.


I added some additional details using the bevel and extract tool - such as a large rail, and some insignia in the side of the bridge.


After unwrapping it in roadkill, I sent the bridge into mudbox, and began sculpting it a rocky surface.


I mainly used tileable alphas and the dam strandard tool, to bring out the rocky details.


In hindsight I think I might of overdone it with the rocks sticking out, I think a smoother surface at least on the collumn, would of been a better option.


I then re-unwrapped the model, so I could capture the unique details on the high-poly model. (Originally I had mirrored uvws)


When I was done with the unwrapping, I added some caps to the end of the bridge, incase it got separated.


As usual I baked out various maps and put the model into dDo.


I had to mess around with the textures a fair amount, as it was hard to find a material that didn't appear too dull. I experimented between the concrete and stone statue textures, until I found the result I liked.


Overall I wasn't completely happy with the result of this model.

I feel that the textures were rather dull, and the model itself was lacking.

I think if I have time to revisit it, I would like to add alot more detail to the bridge itself, although we wanted it to be a natural, I think a few crafted details would add lot more life to the model.


The Bird Boss - Resculpting

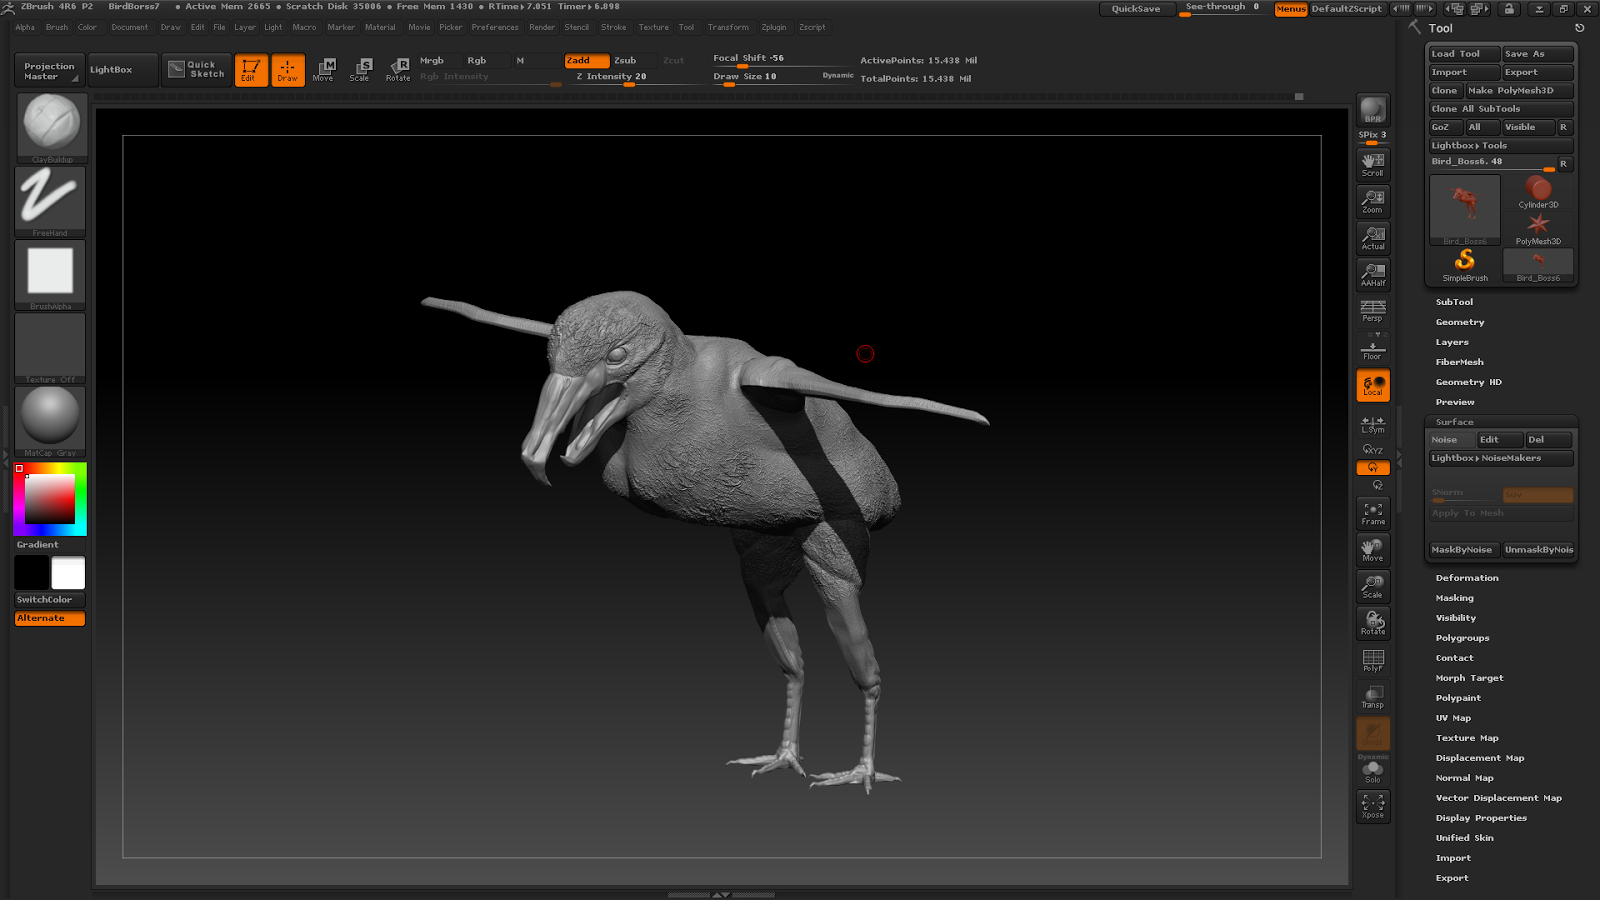
When it came to re sculpting the bird, I wanted to use the new zBrush techniques I learnt to add more detail to the model, and to produce a better result.

I began by sending my bird's model over to zBrush without the feathers.


For the bird's beak I was looking at a few references, but I settled on mainly trying to follow the form of a prehistoric bird:


Although I wasn't following it exactly I tried to make sure to have the high nostril and hard edged beak.


I experimented with the polish brushes a bit more on this, trying to keep the beak hard edged and sharp.

I then moved onto fleshing out the muscle around the eye using the claybuild up brush. I was focusing on bringing  out the volume of the eye-lid.


For the jaw and mouth I wanted to continue building the muscle around it.


I also started focusing on adding a sort of fleshy border between the beak and head, using the buildup and dam standard brush.

For the finer detail I used a hair alpha brush:


I found that using a feather alpha in the previous attempt to sculpt the model did not go very well. I found a hair brush useful just for adding some texture to the body and stopping it from looking completely bald.
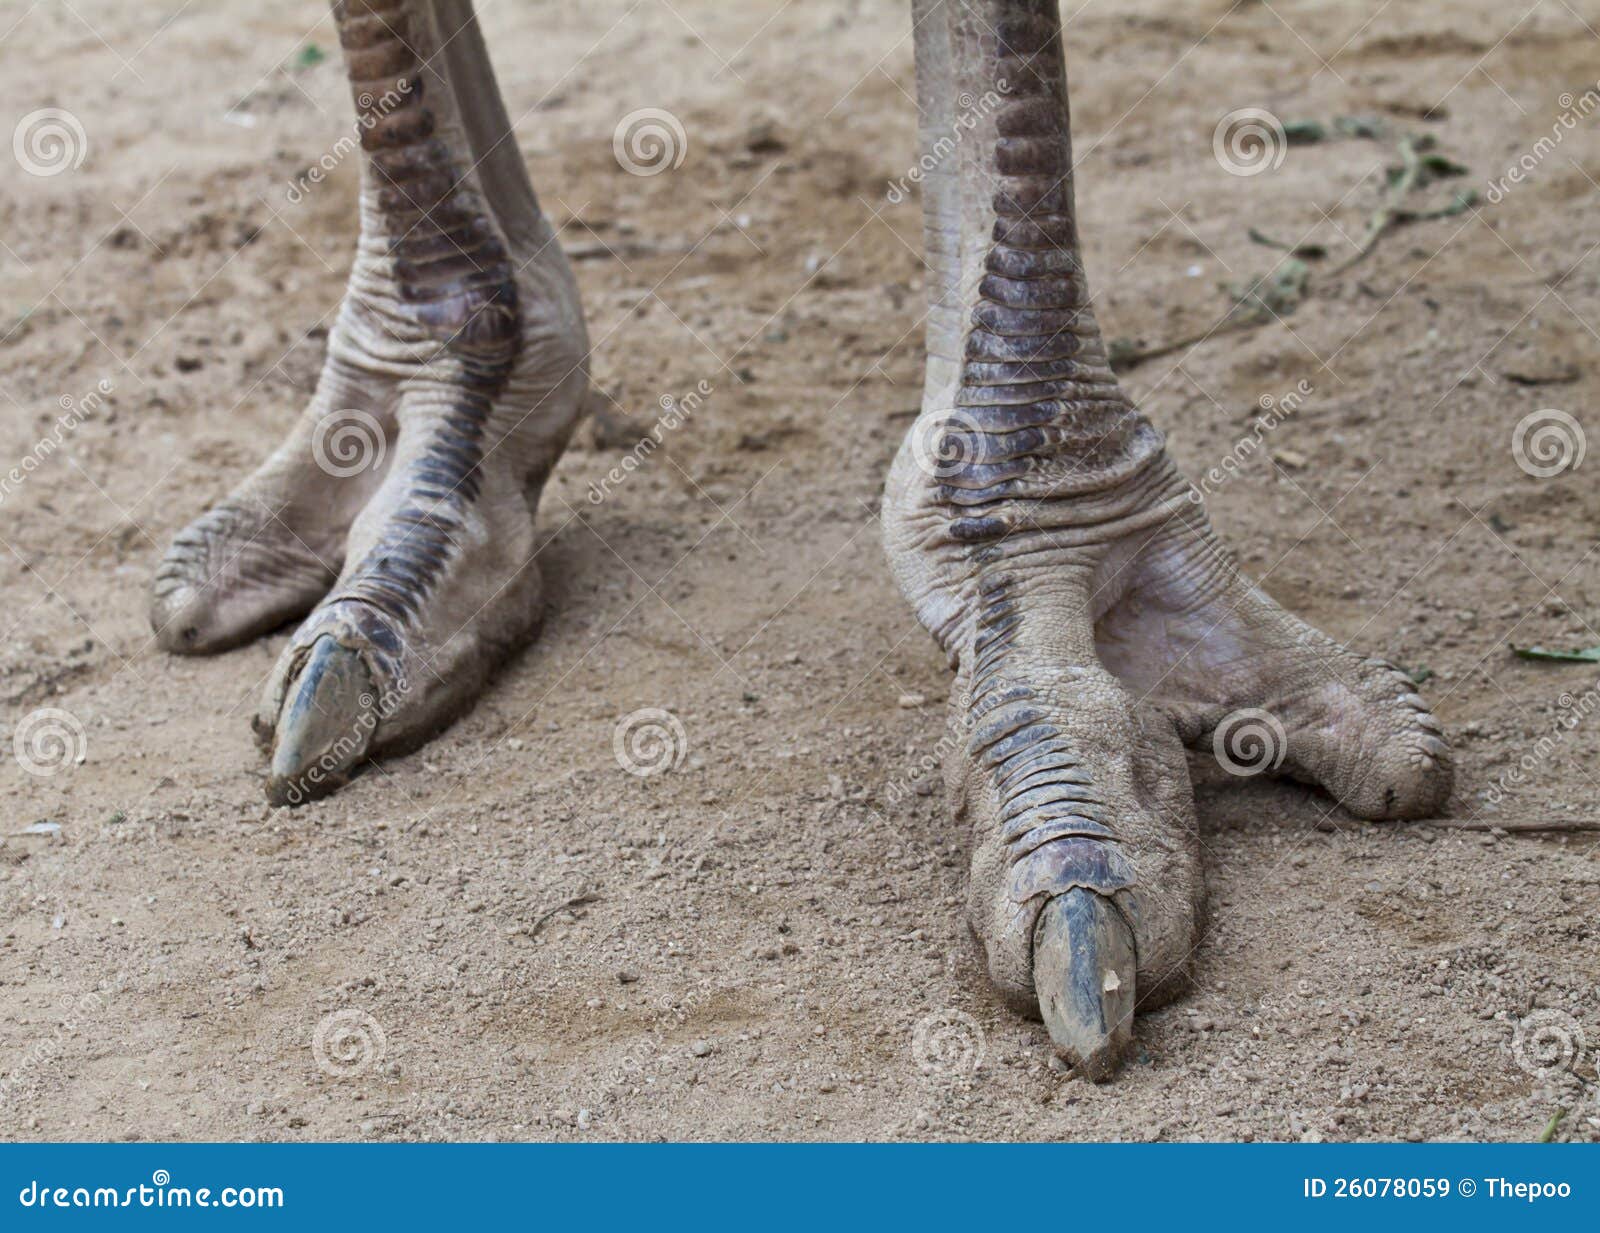
When it came to the legs, I stuck with the reference of ostrich legs that I used before:


I started with building up more muscle volume on his legs:


I wanted to make sure that they looked sinewy.

For the details of wrinkled skin, I used the dam brush again:


This brush was very useful when it came to creating the scaly texture on his shins.

I puffed out his chest a bit more, as I found that bird's actually had quite strong chests as indicated by this anatomy image:


I then added some detail to his spine, mainly using the surface noise to erode and adding some surface scrapes to the model.


Finally I finished up with some extra details, such as a revisiting the flesh on his beak, and making his tongue more spiky and monster-like,


Revisiting the bird's sculpt was definitely worthwhile. He already looks a great deal better, and I'm eager to see how the sculpt when add to the textures of the model.

The Lion Statue - Modelling and Texturing

We needed a bridge that could be pulled down by the grapple hook at the beginning of the game.

This is so that the player could cross a gap.

I started with a 9 meter block to act as a ruler.


With this as a guide, I began constructing the statue at the base of the pillar.

I began to extrude and pile the base of the player up as if it was stacks of slabs.

I used the relaxed tool to give it a slightly rounded edge.


Initially I wasn't too certain on what design to make the statue, so I decided just to create a low poly base mesh that I could sculpt in zBrush.

I scaled some parts of the pillar so that I could get some additional volume in those particular areas.


I also extruded inwards and added a small crack/hole in its base, so that it makes sense to topple down there.


In considering what I was going to model the pillar as, I decided to look at some various statues. One that caught my eye was a lion one:


I decided to try and mimic this particular statue as I thought it was visually interesting.

I started simply by sculpting up my base mesh to the general proportions of a lion's head.


I then started using additional references to further create a more accurate looking figurehead.


I continued to refine the model as I best, I could.

One problem area was definitely the lion's nuzzle as it was hard to manipulate the sculpt into getting the right proportions.


When I was fairly happy with the lion's head's proportions, I began to work on the body of the pillar.

I wanted some variation it the stonework, so I decided to try and mimic the stacked slabs at the base of the statue.


I used the polished tools to start creating harder edges on the model itself, so that it would resemble stonework more than clay.

This was quite tricky as I had to strike a balance between polishing an edge and not overdoing it so I'd lose details.


For the finishing touches, I added cracks and dents using both alphas and dam standard brushes.

I also added a ring to the lion's mouth, so that the player can see what to grapple onto with their hook.


I used the zRemesh guide brush and the crease brush to help re mesh my model. This allowed for good topology and a better polygon flow in the low poly.

After unwrapping the model I split it into various parts so that pieces of the lion, could be placed around the scene as modular props.


Finally I took the model into dDo with my maps, and created some materials.


I decided to make the ring gold, so that it would stand out against the statue's rocky texture.


I was quite pleased with the result of the statue. I feel that the cracks and eroison really brought the materials to life. However I think I need to final an alternative to the zremesher, as I feel that the statue lost a bit of form and hardness in the decimating process.

Still it was a quick prop, and I feel that it works well for our game.

The Grapple Hook - Modelling and Texturing


When it came to modelling the grapple hook I had a couple of designs I wanted to try.

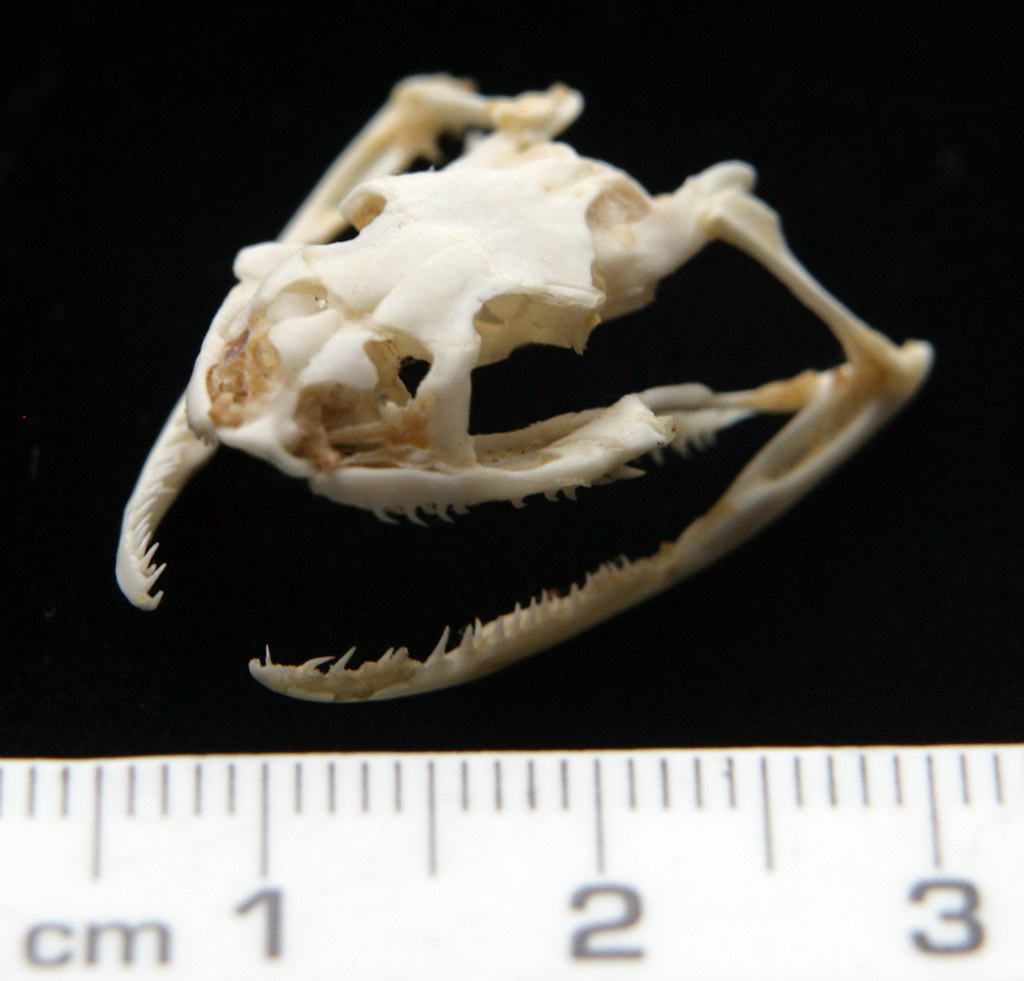
The first was inspired by a snake's head:


The original design was intended to be a split snake's head and jaw, with it's teeth acting as the hooks.

I started with a cylinder, and used the extrude tool to begin shaping the handle.


I continued using the extrude tool, so that I could create the arms/prongs of the grapple hook.


I continued to try and curve the edge of the hooks, at the beginning to create a snake's broken maw.


I started extruding teeth , and added a small handle at the base of the model, to loop the rope through.

I started modelling the front prong into the top of a snakes head, embedding a sphere to act as a gem eyesocket.


However I wasn't particularly happy with this design. It wasn't being created as planned, and overall I got stuck on how to form it into a convincing model.

I ended up starting over and looking for a different design:


I was really taken by the intricate designs of the hook, and the sharp/thin edges of the blades.

I decided I wanted this design for our grapple hook, as it was unique and somewhat beautiful.

So after constructing the handle, I extruded the top and bladed arms of the grappling hook.


I continued to extrude and refine the edge as I went along, to give it a thin, blade like metal surface.

I also used the bevel tool to add some additional detail to the tip of the hook.


Finally I added a hole at the bottom of the handle for the rope to attach and beveled the bottom of it, to give it an end cap.


I exported to roadkill and uv unwrapped the model, before sending it back to 3ds max.


I did not do too much sculpting on the model itself, I most focused on finer details.


I concentrated on creating some embroidment on the blades and handle of the grappling hook. I used stamps and alphas mainly, focusing on a floral design, which juxtapositioned the desert canyon a bit.

Finally after baking my maps from the highpoly model, I followed with my quixel dDo work flow and created the materials.


I also used nDo to create a leather texture/wrap around the handle for the character to grip.


I was pleased with the model of the grapple hook.

I perhaps wish I could of gone with my original design of a snake's head, as the idea itself had some good character to it, however in terms of time constraints and deadlines, I feel it would of taken too much time to plan out properly.

I'm pleased with the detail of the materials, I feel the metal is very convincing, and the golden embellishments add a lot to the model.