Tuesday, 3 March 2015

The Main Character - Upper Body

Before making the model a-symmetrical like the original concept, I decided to start fleshing out his upper body.

I added some additional edge loops to the upper body, so that I could extrude extra geometry.


I followed this method as I wanted as much detail in the geometry as I could get, within reason, so that when it came to sculpting I could push for extra detail.


I tweaked and moved the edges around to create the creases and folds on the cloth, in preparation for moving it about after I remove the symmetry.


I also took the opportunity to start creating the belts around the mesh. I approached these in a similar manner to how I did the boot straps. I made them as separate pieces and combined them.

Once I was happy with my symmetrical geometry, I collapsed the stack and turned my focus to the character's arms.

I selected various edge loops on the left arm and used the scale tool to bulge out the shape. I tweaked this until I had a baggy sleeve shape that I was somewhat happy with as a base.


I feel that having a focus on the asymmetrical assets of the character, helps brings the designer closer to the initial concept, and also makes for a more interesting outfit.

Hopefully when it comes to sculpting the model in zBrush I can transfer some of the detail back to the actual model, due to the extra geometry I've added.

Friday, 27 February 2015

The Main Character - Boots

My next focus on the character was to start adding detail to the character's mesh.

I decided to start with the boots and began by modelling out more of the detail. Focusing on adding more geometry to the overall form. I used the extrude tool to flesh out the lining at the top of the boots.


When I was satisfied with the structure of the boots, I turned my focus onto creating some straps around the calfs. To make life easier on myself, I created one strap from a torus primitive, then edited its geometry until I was happy with its form. 


I exported the strap into roadkill, then did an unwrap, before sending it back to 3ds max.


Then I simply duplicated the belt straps and placed them where I wanted them to sit on the character's boots.

My next goal was to construct the hooks and boot laces. I went about this the same way with the belt straps, by constructing one model and unwrapping it, before duplicating it and moving it into place.


Once I had everything where I wanted, I mirrored and duplicated the models so they sat perfectly on both boots.

I then tweaked the calf's on the boot to bulge out slightly, between the belts to create the illusion of a malleable material being pressed by the tight belts.


I learnt a few new techniques to help better my workflow. I found iterating and duplicating models to be a handy way to speed up creation and also reducing the actual work load.


Although these posts are out of date, I will be trying to make a new effort to post more frequently, normally after every time I make a update to the project.

Monday, 24 November 2014

The Bird Boss


We decided upon having a boss that could fly and swoop down at the player initially, which then formed into the idea of a bird. Our initial aim with the bosses was to have them be giant and imposing to the player.

I begun with various different designs to the bird, eventually settling on design D) with a combination of C)'s spine and E)'s glowing eye.


I also did a sketch to visual the combination of these elements. I tried a more painted art style, as we were still in a process of deciding what sort of art style to go for.


I also mocked up an early (but incomplete) storyboard for how the bird boss fight would proceed.


I did three reference planes of the bird without it's feather and set them up in a scene in 3ds max, which I then proceeded to box model, using the planes as a guide.


Once happy with the base mesh, I uvmapped the mesh in Roadkill, then separated it's elements and sent it to zBrush.


I used zBrush to sculpt and add detail to the geometry, which I then exported as a high poly mesh, and using xNormal created normal maps from.


Back in 3dsmax I used the hair and fur shader to create the feathers for the bird. To achieve this I used splines as a guide for the feathers to follow, then had the planes use the texture of a feather I made in photoshop. When I was happy with it, I exported the feathers as a mesh.


I created the diffuse and specular shaders from a combination of the normal map, ambient occlusion and painting in photoshop.

I was very happy with the result of the bird, I learnt a new technique for creating planes easily, and felt that my workflow has improved well enough that I can produce a finished result at a quicker pace.

Thursday, 6 November 2014

Designing the Main Character Part 1


For our main character we agreed upon expanding on the initial sketch of him, using him as a base idea for our model's inspiration.


Although we had a initial design I decided to try out some different themes for the character and his outfit.

I started with some rough silhouettes that I painted up, I left them unfinished however as I was getting frustrated with their designs and couldn't think of one I was happy with.


Instead I decided to work on some sketches divided into a variety of layers so I can easily move the different clothes and heads around, my aim was to have a variety of different styles so we can combine the group's favorite features together into one character design.

After deciding on some features, I began modelling a base mesh and test model for our grey box, based off the most favorable features.


I started by using makeHuman to create a base mesh for the character, then from there I began creating the symmetrical base of the model.


Once I was happy with the base, I made a rough mesh for his hair, making sure it's against the head model's faces.


My next stage was dragging out the tabard/tail coats, I extruded this from the model then just made sure it stayed hung in place.


Lastly I modeled the extra bits and pieces such as the belt and wrist bracer, so that our animator could keep these objects in mind when he started rigging.


I then sent the base mesh to zBrush to have a go sculpting and adding detail to the clothes, I then baked this into a normal using xNormal.


Finally I made my diffuse out of the normal map and a AO map, then just edited it in photoshop.


For a very early model for our test tutorial, I am happy with the results. Obviously needs more work in terms of sculpting and normal maps but I intend to practice more with zBrush considering I had not used it before.

My next goal for this model will be to work on it's final design:

Summer Pre Production Ideas and Artwork

During the summer we took the opportunity to come up with some ideas for our game. We settled upon an adventure came, with a focus upon a few but powerful enemies that you had to use your wits to get past as opposed to button mashing attacks.

With this in mind I produced a few sketches and ideas at the end of summer for our project.


First thing I did was a rough story board proposing a scenario with one of the enemies in the game, where our player has to navigate a tunnel maze and use his lantern to escape from the boss. Our group was fairly fond of the idea of using puzzles and wits to defeat the boss and we decided on making this one of the main features of our game.


 Secondly I did a couple of sketches suggesting what sort of characters we might have in our game. We agreed upon a slight arabian/desert inspired setting, hence the whites and loose clothing on the characters. The drawing of our human main character served as the initial basis of our protagonist's design, and it's something I plan to take further. On the other hand the troll, as fun as he was to design wasn't really a character we're going to take any further - rather we'll have a focus on more large and bestial type enemies such as birds and worms.


I also put together a moodboard, so we can have a focus on our art style and how we want our game and locations to look.

Overall I felt these sketches served as a good way of initiating ideas, and I hope to practice further during pre production in order to have a better presentation on my artwork.

Year 3 Work - Character Artist

From this post onwards will be my Year 3/Final Year Project work.

I'll be a part of a group this year, as we attempt to produce a game for the end of year show.

The role I have been assigned is character artist, which is the role I was intended to do in the first place.

I chose this role because my primary interest is in designing and creating characters, I want to take a design from my imagination and develop it into a final and playable result.

My goals for this year are to improve my overall work flow, from start to finish - I aim to have a more focused pipeline, so I can achieve a result quickly, but also at a much higher quality than before.

I'm planning to look at zBrush so I can produce high quality sculpts of my models and render them as normal maps, if I'm aim able to I would also like to become proficient enough to be able create everything from start to finish in the program, and retopologise later.

My initial work goals are to produce the Protagonist Model along with three boss models of different models, for a stretch goal we might produce standard enemies so I'll model them as well.

Wednesday, 14 May 2014

Vertical Slice - Treeman UVS and Textures

My final piece for the vertical slice was uvw mapping and texturing Joe's treeman model that he made.


I used roadkill to unwrap the tree, which was tricky due to how many parts and little time we had left to finish the project.


I sculpted the tree in mudbox, then painted the textures over the top using the paint and projection tool, before extracting the diffuse and maps.


Vertical Slice - Environmental Assests

To make up for our lack of environmental assets, I did a couple of additions to the scene.


I made some columns so that the player can jump and climb, these were to replace the place holders in the pit at the beginning of the swamp.


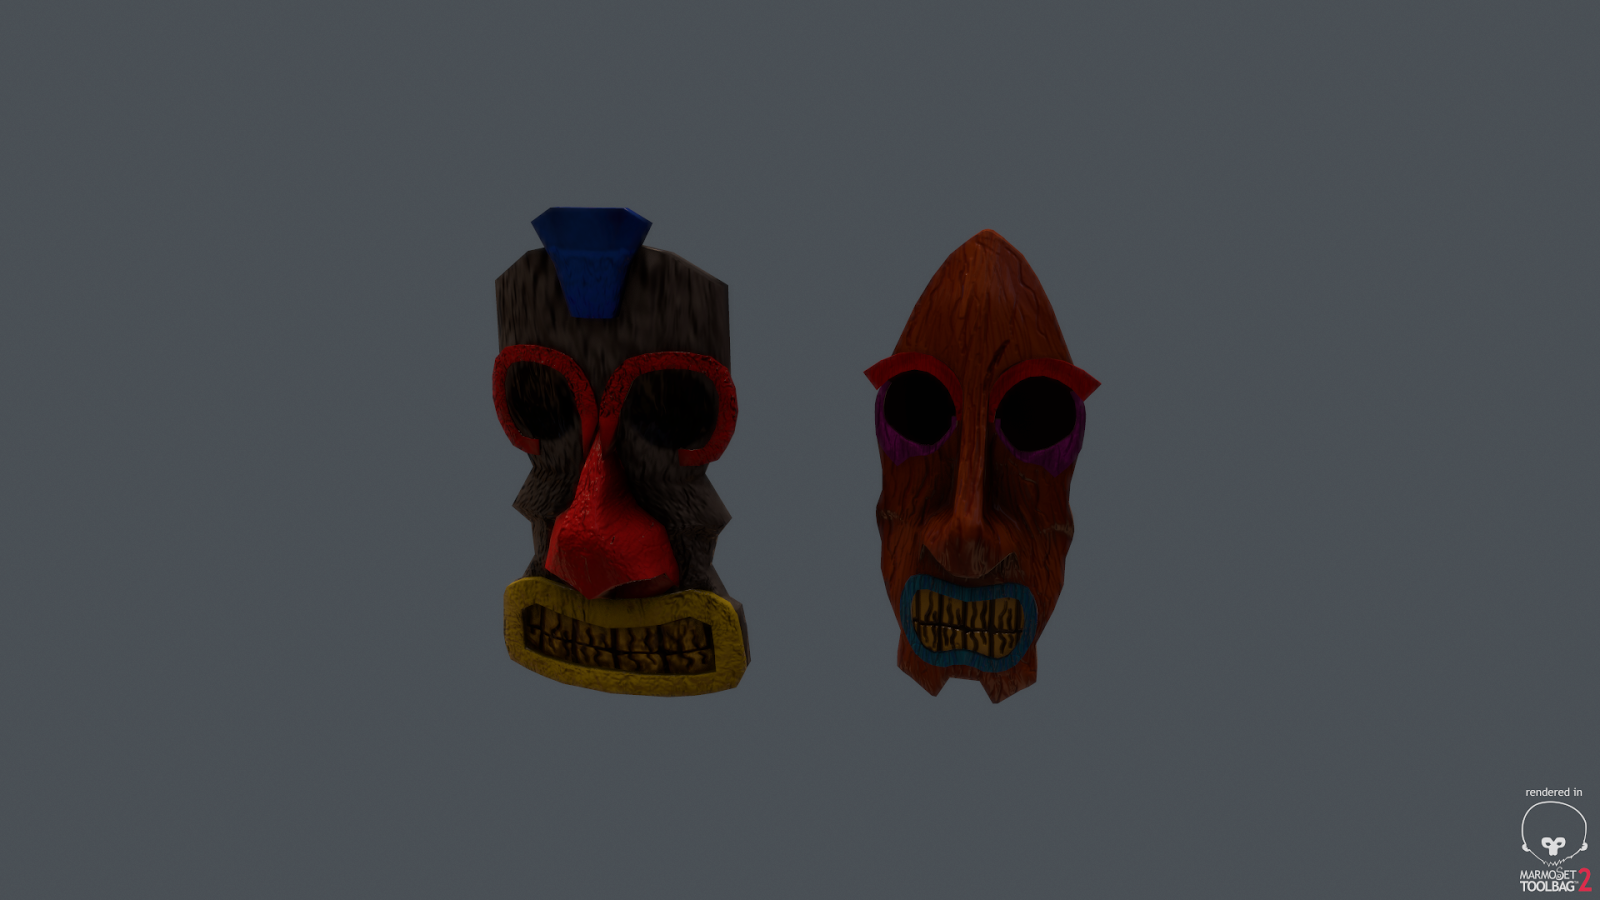
I also did the textures, sculpting and maps for Joe's Tiki Mask Models.


I did some textures for the lava area, and for the web obstacles.


Vertical Slice - FireFly Sculpt and Rig

Nick modelled the FireFly enemy for practice and Ash did the diffuse for it. They sent it to me for sculpting and rigging.


I used Ash's diffuse as a guide to sculpt the model, which I then extracted as a normal map and AO map to give more detail to the model.

I then brought the fly into Maya so that it could be rigged and sent to Nick for animating.


I was happy with the result of the normal maps as I felt it completed the model and the effort Nick put into it.


Vertical Slice - Giant Tree

Due to our environmental assests being behind, I had to pick up some of the slack. We needed a giant tree for plat forming in the scene, but due to time constraints there were a few issues, but I did get the model done.


I started with the tree stump base mesh from Mudbox then I extruded it and warped it into the shape of the tree we wanted.


I extruded branches and mushrooms as platforms and tried to predict the overall jump and distance. Unfortunately we did not know how to export the Unity scene as an FBX at the time, which would of made this process much easier to create the model for platforming purposes.

However when thats done I unwrapped it in roadkill.


I sent the tree into mudbox to be painted and sculpted, before we placed it into the scene.


I was happy with the result, however it did not work well as a plat forming element and since we were pressed on time there was little changes that we could of done. If the environmental artist had got it done earlier I think we could of made it a stronger platforming element in the scene.